As a gardening blogger and writer, I probably shouldn’t admit this, but I don’t start seeds indoors.
Living in zone 3, I should start most seeds in March or April. But April is always extremely busy at my day job, with lots of stress and long hours. Typically, I forget to water, don’t have the patience to adjust grow lights, and don’t have time to carry plants outside before work so that they harden off. The few times I tried this, it ended up being a big, fat failure. I don’t even try anymore.
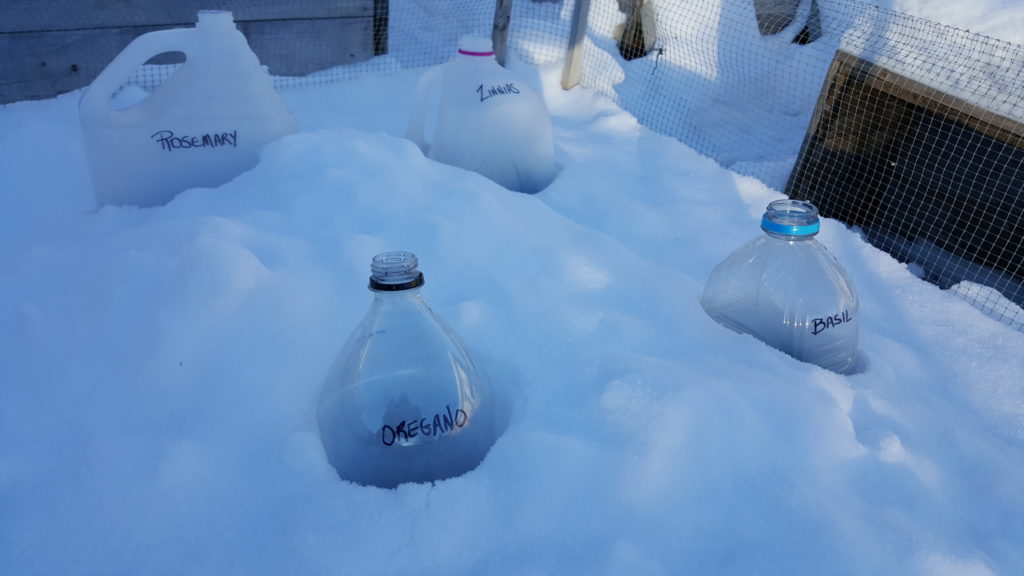
That’s why I was excited to stumble across the idea of winter sowing. In a nutshell, winter sowing is planting seeds in re-purposed plastic containers, which act as mini-greenhouses. Once planted, the containers should be put outside — even in freezing temps, and even in the snow. As the temperature warms up, the seeds will germinate, and the seedlings will stay toasty in their little greenhouses.
Looking For Non-GMO Seeds? Get Them From A Family-Owned Company You Can Trust!
The containers will naturally collect moisture through their various openings. The plants should chug along on their own, and naturally harden off. You do have to do some work, though: Once the temperatures stay above freezing, the seedlings should be transplanted into your garden. Since it all sounds logical (and easy!), I’m going to give it a whirl.
Containers For Mini-Greenhouses
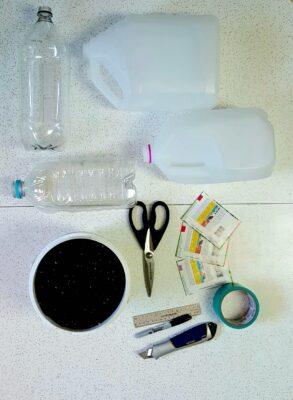
Tall translucent or clear plastic containers work best so that sunlight reaches the plants. Containers need to hold 3-4 inches of soil, and still allow room for seedlings to grow. Consider using containers like these:
- Milk jugs
- Distilled or filtered water jugs
- Large vinegar bottles
- Family-size juice bottles
- Soda/pop bottles
- Rotisserie chicken deli containers
- Clear tote boxes
All containers will need holes drilled or cut into the bottom, both for drainage and so that seedlings can suck up available water. Additionally, the containers will need at least one hole in the top so that moisture can get in that way, too. Vessels like milk, water and juice jugs already have that hole built in. A bonus is that if you live in an area that experiences heavy rains, you can use the jug lid as a way to moderate moisture levels.
Creating And Sowing Your Mini-Greenhouses
Starting with a clean container, make holes in the bottom. Depending on the type of plastic, you may be able to create holes by carefully twisting a knife tip in a circular motion; or you may be able to cut holes with a utility knife. If you have a harder, thicker plastic, you will probably need to break out your drill. If your container does not have at least one hole in the top, this is a good time to get that done, too.
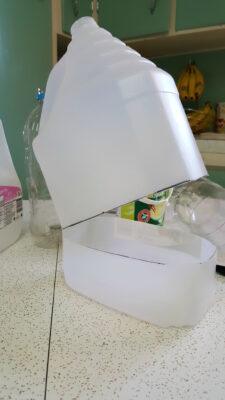
Next, if your mini-greenhouse doesn’t already have a separate bottom and top (like the rotisserie chicken container or the plastic tote), you will need to cut through the container to create a hinged lid. Where exactly you make that cut depends on the container you’re using. Keep in mind that you want at least 3 inches of soil in the bottom. Depending on how much room will be left for the plants to grow in, you might make your cut anywhere from 3.5 to 5 inches from the bottom. It’s handy to leave a few inches of plastic uncut so that the pieces stay together and to form a hinged lid.
This New All-Natural Fertilizer Doubles Garden Production!
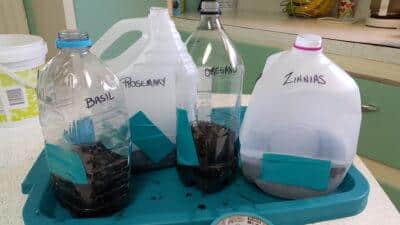
Cover the bottom of your greenhouse with soil and wet it thoroughly. Let the soil drain before planting the seeds to the depth indicated on the seed packet. Once you have your seeds in, tape the sides of the container closed with duct tape. Labeling the containers is a good idea. Then it’s time to stick your greenhouses outside.
Choosing And Timing Seeds
Jessica over at The 104 Homestead has a very helpful zone-by-zone guide to help you choose seeds for winter sowing. Your best bets are hardy seeds, ones that require pre-chilling or stratification, or ones that produce seedlings that can withstand light frosts.
Depending on your zone, you can start putting your greenhouses out between the winter solstice (zones 6 and 7) and February (zone 3). Each month, as the weather grows warmer, you can sow different seeds. Typically, flowers can be planted the earliest, followed a month later by herbs and those seeds that require stratification. And then a month after that, you can get your frost-tolerant seeds in; and finally, about a month before the typical planting dates for your zone, the seeds for tender plants can be started. For myself, in zone 3, this means starting in February and wrapping up in late April.
To work on this project, I visited my local gardening center in January. Not surprisingly for zone 3, the selection of seeds there was limited. (Go online for a better selection.) I picked up what I could, and ended up putting out herb seeds a month earlier than recommended. We’ll see how they do. As for my future monthly greenhouses, I’m going to settle in with a steaming mug of tea and a gardening catalog, to do some research about which hardy varieties would be best to plant next. How about you? Will you give this a whirl, too?
Have you ever tried winter sowing? If so, what tips would you add? Share your thoughts in the section below:
 Off The Grid News Better Ideas For Off The Grid Living


