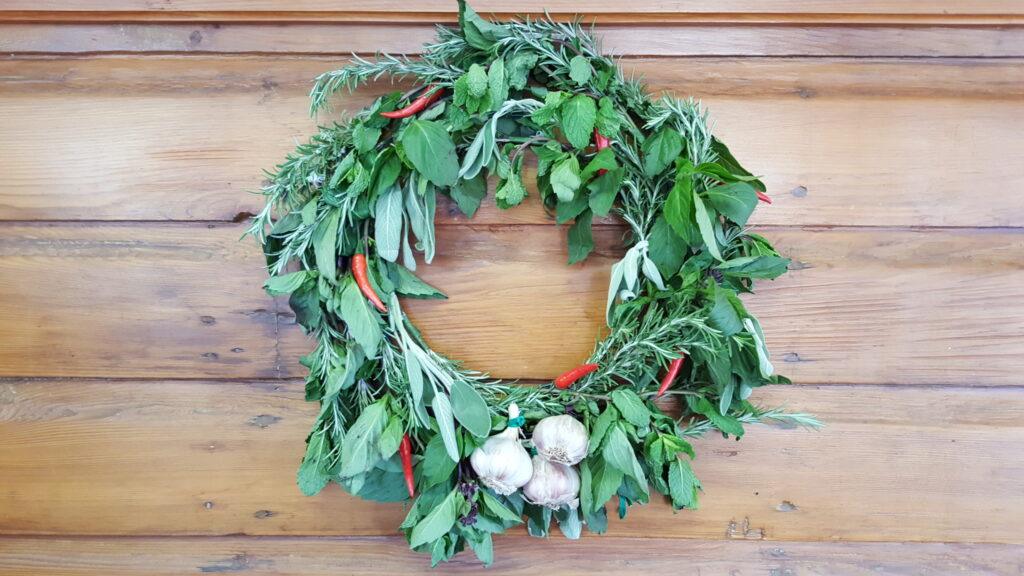
You’ve worked hard growing herbs and vegetables. Why not show off your bounty as a beautiful wreath? Culinary wreaths can be created in a variety of ways. Most start with a base of herbs and may include other small produce — like garlic bulbs or small peppers — for visual interest. Culinary wreaths smell amazing and offer a unique way to access your herbs while cooking.
If you use fresh herbs, they will start to dry fairly quickly on the wreath form. The best fresh herbs for this project are those with woody stems and small leaves, like rosemary, thyme, tarragon, marjoram and oregano. They will be easier to attach to the wreath form and will keep the wreath shape better than those with soft stems and larger leaves, which will droop as they dry. If you’re fortunate enough to live in a zone where bay laurel is hardy, or if you have a bay laurel tree growing indoors, bay leaves work great, too.
Looking For Non-GMO Herb Seeds? Get Them From A Family-Owned Company You Can Trust!
However, I was doing this project on a deadline, with no time to grow a bay tree. I just used what I had available — and I’m pretty happy with the result. Don’t be afraid to try different types of herbs on your own wreath.
All you will need are a wire wreath form and floral tape. Depending on what you are using to create your wreath, you also may find twist ties, thin twine or thread handy. You may want some ribbon on hand to create a hanger, or just a pretty bow. As far as tools go, kitchen shears are all you need.
I started by attaching the herbs with the biggest leaves first. Simply strip the leaves off the bottom 2-3 inches of the stem and securely wrap the stem against the wreath form, using the floral tape. A tip I learned the hard way is that it’s better to use more floral tape than you think you need. If you don’t have enough tape, it will unwind on its own. If you are using herbs with softer stems, be gentle with the stems as you wrap them.
Once the herbs with the biggest leaves are secured to the wreath form, start filling in the gaps with smaller herbs. Take care not to crush the ones that are already attached to the form. For much of the project, I simply stood the wreath on my lap and rested the back of it against the table edge. But once I could no longer keep it on my lap without crushing the herbs, I hung up the wreath.
It can be a little awkward to work on your wreath while it’s hanging, but a big plus is that it’s easier to see which areas need to be filled out more. As you work, cram in as many herbs as you can. You might also want to bunch two or three stems together as you tape them onto the form, to create a nice full wreath. Remember that as the herbs dry, they will shrink, so the more that you can attach, the better.
Once you are happy with your herb base, get creative and add in other produce for visual interest. I used twist ties to attach garlic bulbs, and thread to attach red Thai peppers (which, to be honest, I bought at the supermarket). Depending on what kind of herbs your wreath is made from, other possible embellishments include cinnamon sticks, a string of cranberries, dried orange slices, and flowers or Chinese lantern pods.
Once you are happy with your finished product, hang it up in your kitchen and get ready to pull off pinches of dried herbs as needed. Your wreath will be beautiful, practical and a point of pride, because you grew the herbs and created the wreath yourself. That’s the best kind of project, don’t you think?
What advice would you add? Share it in the section below:
Bust Inflation With A Low-Cost, High-Production Garden. Read More Here.
