When it comes to sweet delectable gifts given to us from nature, maple syrup ranks as one of the best. Tapping maple trees for sap and making it into syrup is a surprisingly simple process, can be done at any scale, and is achievable by anyone with access to maple trees and a few basic supplies.
The Basics of How Tapping Works
The rudimentary science goes something like this: the natural fluids inside trees tend to remain dormant during the cold of winter, but begin to rise and fall between the roots and branches when spring arrives. This brief period, during which the temperature rises well above freezing during the day but continues to dip back to cold overnights, is the best time to extract the fluid — or sap — from the tree by way of tapping it.
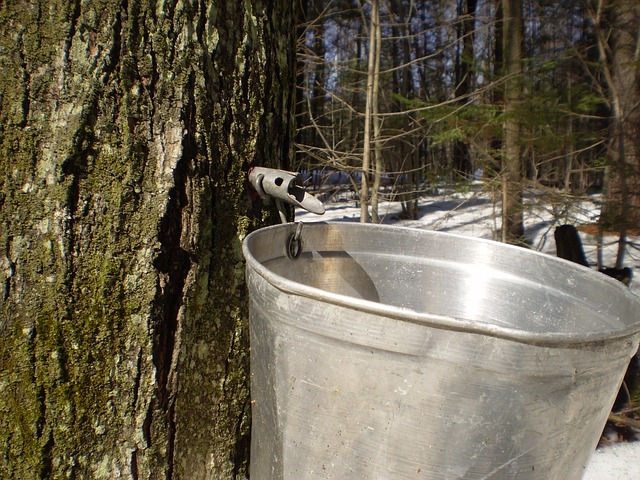
The way to do this is to drill a hole through the bark in order to access the sap, insert a specialized funnel-shaped spout called a “spile,” and hang a bucket under the spile to collect the liquid.
The Basics of How Sap Becomes Syrup
Anyone who has spent any time in the kitchen knows that boiling liquids in an uncovered pan causes the liquid to “reduce,” or become thicker. The more surface area in the pan and the hotter the heat, the faster liquid will evaporate into the air.
Making maple syrup works along the same principles. It begins with sap, which is more water than sugar, and boiling reduces it into a thick sweet syrup. It takes roughly 40 units of sap to yield one unit of syrup.
Equipment You Need to Make Syrup
The equipment needed for a syruping operation varies widely, depending on the size of the project. That is one of the beautiful aspects about making syrup — you don’t need to invest in a bunch of supplies if you want to just try it out.
Are You Prepared For A Long-Term Blackout? Get Backup Electricity Today!
For an easy first-time one-tree backyard tapping project, you need:
- Drill, either cordless electric or hand-crank, with a 7/16 bit for standard-size spiles.
- Spile with hook, made out of metal or plastic, available online or at hardware stores and specialty retailers.
- Hammer or rubber mallet.
- Bucket, either one made specifically for sap collecting or a jerry-rigged one. Covers are nice to keep out debris and precipitation, but not crucial. You can rig one out of recycled materials if needed.
- Heavy stockpot.
- Filtering material — cheesecloth or paper coffee filters.
How to Tap
Select a tree for tapping. Sugar maples, also known as rock maples, are best, but other maples — and even other kinds of deciduous trees — can be used. The tree should be healthy, eight inches or more in diameter, and ideally have a widespread crown.
Drill a hole in the tree 2 and ½ inches deep, holding the drill at a slight upwards angle. I wrap masking tape around the drill bit so I can tell when to stop. Run the drill in reverse to get out the pulp.

Attach the hook to the spile before inserting it. Using the hammer or mallet, gently tap the spile into the hole, with the pour spout on the bottom.
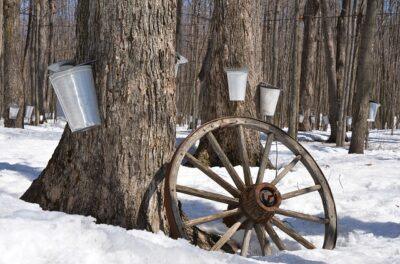
Hang the bucket and wait for the sap to run. Depending upon the tree and the weather, you could get as much as two gallons a day, or as little as a few drops.
It’s important to check your tap every day. The warmer and sunnier it is, the more it will run. Between boils, you will need to keep it cold to avoid bacteria growth.
You can drink sap the way it comes out of the tree. It is tasty and said to have health benefits, but take care not to overdo as it can have laxative properties.
When the tree begins to push buds, the sap will begin to taste bitter and it’s time to pull the spile out of the tree. You can do this with pliers. Wash it well and put it away for next year. The hole in the tree will heal over in a year or two, with no long-term ill effect.
How to Make Syrup
If you can possibly boil your sap outdoors, that is ideal. The reason is because all of that humidity coming out of the reducing sap has to go somewhere, and could leave a sticky residue on your walls and ceilings and even contribute to peeling wallpaper. That said, people do get away with boiling small amounts indoors, especially if their house is very dry from wood heat.
You can boil outdoors using a propane camp stove, but always make safety a paramount concern. Use appropriate practices, keep children and pets at a safe distance, and follow manufacturer’s directions. You also can set up a firepit and build a wood fire.
No matter where or how you boil down your sap, the method is simple. Use the widest, shallowest container you have, and cook it at a full boil. Tend to it carefully. It can roil up unexpectedly every now and then, and you will want to back off the heat if it does. As with any reducing liquid, particularly one containing sugar, you will want to stir it more often as it thickens to keep it from sticking and burning.
“The Big Book Of Off The Grid Secrets” — Every Homesteader Needs A Copy!
When the syrup is reduced to the thickness you like, strain it while still hot to remove any fine debris, foam or grit. There is no wrong answer when it comes to thickness, but simply personal preference — and if you decide later it’s too thin, you always can cook it more.
Homemade syrup can be stored in a glass jar in the refrigerator for quite some time. If you question its freshness at any point, you can skim it and reboil it.
Ongoing Options
Once you have made and used your own homemade maple syrup, you are unlikely ever to want to return to store-bought stuff again, and you eventually may want to step up your game and tap more than one tree. When it comes to the many permutations of tapping and syruping, on any scale from 10 trees to 10,000 trees, the sky is the limit.
After trying a single tap, you may choose different style spiles or buckets or perhaps even abandon buckets altogether and go for plastic tubing instead.
Your boiling options include everything from homemade outdoor wood-fired evaporators made out of masonry, metal or earthworks, to retrofitted turkey fryers, to commercially manufactured evaporators.
You may end up purchasing specialized felt filters with paper liners, skimmers, maple-leaf-shaped syrup bottles, and other useful and fun accessories.
As with any hobby or venture, it makes sense to start off small and expand gradually. With maple syruping, you will want to research each component as you go, evaluating cost and balancing needs to create your own customized process. But for now, a few dollars and a little time can result in delicious maple syrup and bragging rights of having made it yourself.
What advice would you add on tapping trees for syrup? Share your tips in the section below:
Bust Inflation With A Low-Cost, High-Production Garden. Read More Here.


