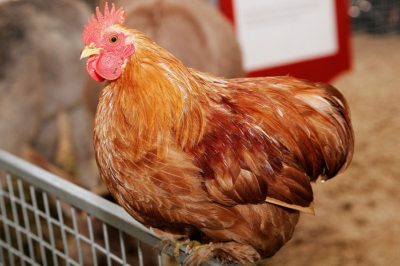
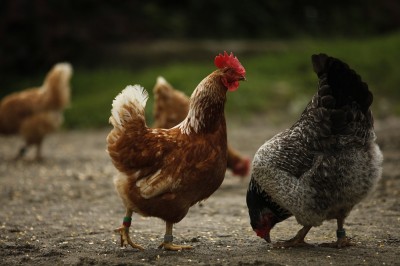
 When it comes to raising chickens, most likely at some point you will have a bird that you wish to process.
Egg-layers make good soup once their productive years are done. There are also many “all-purpose” chicken breeds, like the Buff Orpington or the New Hampshire, where you can cycle a flock and have new egg-layers every year and process the older birds. Most homesteaders raise these types and plan on processing them.
But butchering a chicken can be daunting at first. Whether you’re processing an old egg-layer or a batch of meat pullets or capons, knowing the best way to butcher a chicken can go a long way toward making the process quick and easy.
To begin, first catch your chicken (and preferably have it off food and water for 12 hours before butchering, as an empty crop is easier to handle). You’ll want to start by tying your chicken up. Chickens instantly relax when held by their feet upside down, so once the chicken is caught, hold it upside down and tie its feet securely on a rope. You can have the rope dangling from a tree, a beam in your barn or any other area that allows for the chicken to hang freely. It probably is best to have this out of high traffic areas, as many people don’t appreciate seeing a bird dispatched.
Dispatch
Take a very sharp knife in one hand and turn the chicken’s belly to face you with the other. Grasp the chicken’s neck and slide your hand all the way down to the base of the skull. Grasp the neck between your thumb and pointer finger and your hand will cover the rest of its head. For anyone who is a little reticent about killing the bird, this can make it easier since it hides its eyes. You can’t see it and it can’t see you. Now, take your knife and bring it near the bird’s neck. Make sure you angle the knife up just a little toward the bird’s belly so you don’t cut your hand or fingers.
All The Answers To Every Chicken Question And Quandary…
Then, relax, and make a clean cut through the head and neck. Your goal is to move your knife between two neck vertebrae. By keeping the knife almost parallel with your hand (but angled slightly up to make sure you don’t cut yourself), your chances of a smooth, clean cut are greater. If you run into a vertebra, you may have to back out and try again. Stay calm. It’s quick for the chicken. The bird may flutter a little after losing its head, but this is normal post-mortem movement.
Scalding
The next step is to scald the carcass, feathers and all. Take a pot large enough to completely immerse a chicken in and fill it with water and a few drops of dish soap. Heat this water to between 140 and 150 degrees Fahrenheit. You can do this on your kitchen stovetop or use an outdoor burner. Either works perfectly well, although the outdoor set-up can help keep the mess outside. Grasp your chicken by the feet and dunk all the feathered parts of the chicken into the water. Keep immersing the bird, checking the wing feathers every 30 seconds. Chicken wing feathers are very firmly secured, but the hot water and dish soap will loosen them. When you can pick up the wing feather and it slides right off, your chicken is ready. Immediately take the carcass to a large pot of cold water. You want to halt the cooking process that began in the hot water dunking.
Plucking
Once the carcass is sufficiently cooled (about a minute or two), take the bird and lay it out on a table covered with newspapers or plastic. Pluck the wing feathers first as these become more difficult to remove as the bird continues to cool. Then place the bird, breast side up, legs away from you and, using both of your hands, work them over the bird, pushing the feathers out and away from you. Think of it as wiping or rubbing the feathers off the chicken. You don’t need to worry about plucking the tail feathers as you will be cutting the tail off later. Feel free to gather the feathers and compost them then.
Evisceration
Trachea and Esophagus
You’ll start with the neck. (Here’s where having your chicken away from food and water for 12 hours prior to butchering becomes important.) Cut away part of the skin on the neck so you can remove the crop. It’s best to remove the crop this way so you don’t drag it through the body and potentially leak food. Loosen the trachea and esophagus with your hands so you can rip it out. If you use a knife, there’s a greater chance of cutting it, so ripping it out is better. Work the crop loose from the skin, being careful not to burst it if it does have food in it, and then pull everything loose. If you do accidently leak food from the crop, rinse your chicken and table area off before moving on.
Feet
Take the feet and pull them out away from the body and bend them backwards until the joint between foot and leg protrudes out just a little. Then take your sharp knife and make a shallow cut at the joint. Make gentle slicing cuts on the tendons here. You don’t want to cut the actual joint itself. Repeat this with the other foot then until the feet come loose. You can save the feet and use them for chicken stock.
The Belly
Have the bird resting breast up on the table and pinch the lower portion of the belly and make a horizontal cut at the base of the belly. You want to start a small hole here. However, don’t keep cutting once you have opened the hole or you could hit the intestines and contaminate your bird with chicken poop. Instead, once the hole is started, put some fingers inside and rip it open.
Want The Best Chemical-Free, All-Natural Insecticide — For Your Garden AND Home?
Next, grasp the chicken’s neck with one hand and work your other hand into the belly cavity. Run your fingers up along the top of the ribcage and work in until you feel a large, solid lump about the size of a golf ball. This is the gizzard. Pull it out. Then, place your hand back inside and this time work on the bottom of the bird, near the shoulders, to find the lungs. These can be difficult to remove, but by using your fingernails and a bit of perseverance, you should be able to get them out.
Vent and Tail
The gizzard will still be attached to the body by the intestines at this point. Be careful with the intestines. Set them to one side and grasp the vent area and cut around it, being careful not to nick the intestines. Even if poop does squeeze out, it will come out of the vent and away from the body. Now flip the bird over, so its back is up, and bring the tail end of the bird toward you. Then cut through the spine from the top near the tail to remove it. You may need to wiggle the tail a little as you cut to help you work through the spine. The tail and vent will come off all together. This will pull the whole intestines free from the bird.
Remaining Organs
Use your fingers to go back inside the bird and pull out any other organs. There may be sexual organs, kidneys (which can be left in as they are difficult to remove) and other smaller organs. Clean it out as best you can.
Neck
Rinse the bird out well and then bring it back and set it on the table in a sitting up position. Then grasp the neck and make deep cuts in the neck close to the shoulder area. Then twist the neck and it should pop loose. Rinse the carcass one more time and if you’re saving some of the internal organs (like the heart, liver and gizzard), rinse those as well. Place them all in a bag together and your chicken is ready for refrigerator or freezer.
While butchering a chicken is surely not as simple as picking up a processed bird from the grocery store, the above outlined steps can make the entire process as quick and easy as possible. There is a slight learning curve, so give yourself some grace with your first bird. The more often you do it, the quicker and smoother the experience will be. Processing your own birds is better for you and your family health-wise and more environmentally conscious. Take pride in a job well done!
What are your chicken butchering tips? Leave a reply in the section below:
 Off The Grid News Better Ideas For Off The Grid Living


