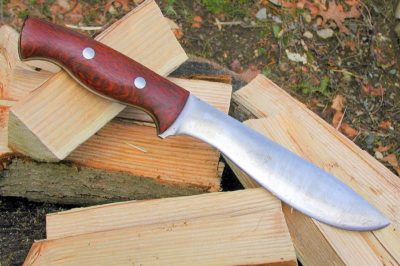
This is part 2 of a 2-part series on making knives. Read part one here.

Image source: bladeforums
Last week we looked at the first steps in making a knife, including grinding it. Now we turn to finishing the knife.
Since you started with a file, the parts of the side of the knife which were not ground will still have the file teeth. While these can be left on, most people will grind them off. The best way to do this is to remount the blade on the other side of the block, which wasn’t tapered and grind them off by making passes across a belt sander, just as you did to grind the blade. It isn’t necessary to grind the file teeth off perfectly in the handle area, as the handle will hide them.
Once your blade is ground to the correct shape and angle, you need to decide if you are going to polish it smoother. Most knives are polished smooth, although it is possible to use a roughly finished knife as well. To polish it smoother, first make a last couple of passes over the edge of the knife blade, using a finer grit grinding wheel or sanding belt. Once you have finished that, it would be good to go over the blade again, hand sanding it with fine grit emery paper.
The final polishing of the blade is done with jeweler’s rouge and a buffing wheel. If you have a bench grinder, you can simply replace one of the grinding wheels with a buffing wheel and apply jeweler’s rouge to it. This will remove the scratches left by the sandpaper, leaving you with a finish that is a dull shine. If you want a more polished look, use jeweler’s polish on another buffing wheel, after the rouge.
Almost any material can be used for a knife handle. The easiest is to make one out of wood. Cut thin slabs of wood to go on either side of the knife tang. Don’t bother cutting them to the exact right size or shape, as it will be easier to shape them on the knife.
Glue the slabs of wood to the sides of the knife with five minute epoxy, clamping everything together tightly. Allow the epoxy sufficient time to cure fully before removing the clamps. Once the epoxy is fully cured, rough shape the wood handle to match the contour of the blade tang on the belt sander.

This knife was made from a sawzall blade, which puts a saw blade on the back side of the blade.
The handle is thin, allowing the knife to be hidden easily.
While the epoxy will probably hold the knife handle in place, we can add some security to it by pinning the handle to the tang. To do so you will need some small diameter brass rod. Cut a couple of pieces of brass rod which are slightly longer than the thickness of your handle. Drill holes through the handle where you would like to pin it and epoxy those pieces of rod in place.
Once the epoxy for the brass pins has had a chance to fully cure, the handle can be shaped on the belt sander. Be careful to not cut too much, as belt sanders can go though wood rather quickly. The brass pins will grind down with the wood handle, leaving a smooth surface. Finish the wood handle with varnish or Tung oil.
The last step to finishing your knife is to put an edge on it with a honing stone. When you were grinding your knife, I said to stop just short of putting an edge on it. That’s because the angle of your grind will create a blade edge that is very thin and fragile. For the knife I made, my blade angle was only 10 degrees. When you sharpen a knife, it’s typical to put a 20 to 30 degree edge on it. That provides a sharp edge, which is not so thin that it will break easily.
Your finished knife will provide you with years of service, as well as the bragging rights of being able to say that you made it yourself.
What tips would you add? Let us know in the comments section below.
Sign up for Off The Grid News’ weekly email and stay informed about the issues important to you
 Off The Grid News Better Ideas For Off The Grid Living


