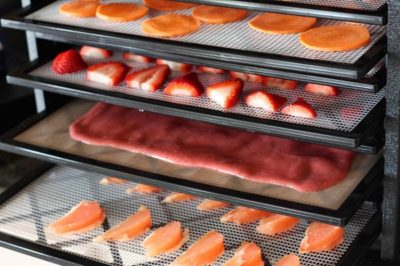
 It’s hard to say when and where dehydrating food started, but it has a long history. The production of salt cod (fish) goes back at least 500 years. Indians in the “New World” were known to make jerky from venison and other meats as early as 1550. Drying grains for preservation goes back at least as far as ancient Egypt. So, while it’s hard to say when it actually started, it is clear that dehydration, as a form of preservation, is the oldest form of food preservation known to man.
For those who are trying to become self-sufficient, drying food is still an excellent method. It is fairly easy to accomplish, secure and doesn’t require a lot of equipment. On top of that, drying food is almost foolproof. Other than accidentally turning something into charcoal, there’s really not much you can do wrong.
As a means of preserving, dehydrating food works because it keeps bacteria from eating the food. That doesn’t mean that nothing can go wrong with the food, because insects and rodents can still get to it. However, the risk of bacteria destroying the food is virtually eliminated by dehydration.
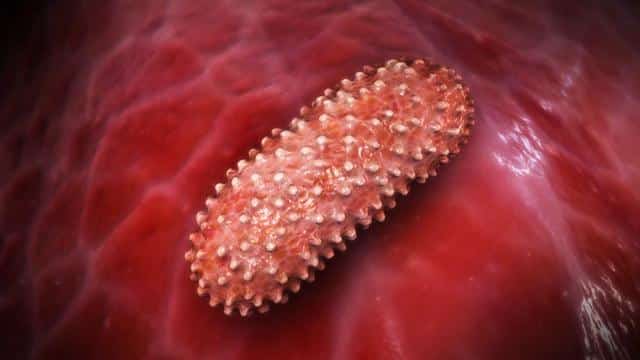
There are two elements in the dehydration process which make it effective for preventing bacteria from getting into the food and destroying it. The first is the dehydration itself. Bacteria are single cell organisms, which like most cells are more water than anything else. The outer membrane of the bacteria is semi-permeable, which means that water can travel through it. When it encounters a totally dry environment, such as being in a package of rice, the dry rice pulls the water out through the membrane, killing the bacteria.
The second element in the process, which is used for meats and fruits, is the presence of salt or sugar (salt for meat and sugar for fruits). Meats and fruits aren’t dehydrated to the point where grains are, so the moisture isn’t necessarily drawn out of any bacteria that might get into the food. However, both salt and sugar draw moisture out of anything they are on. You can see this by putting sugar on a bowl of sliced strawberries. After a few minutes, the surface of the strawberries will be wet. That’s because the sugar drew the water out of the fruit.
When bacteria comes into contact with salt or sugar, it has the same effect, drawing the moisture out of the bacteria and killing it. Actually, either of these will work as a preservative by themselves, without drying the food; however, drying also makes the food take up less space and makes it lighter in weight, which makes it easier to transport.
Traditionally, drying of food was accomplished by laying it out in the sun. Salt fish was first salted in brine and then allowed to sit on racks in the sun to dry. Likewise, jerky was dried in the sun after being seasoned with salt. At times it would be smoked first, but then it was still left sitting on racks in the sun to dry.
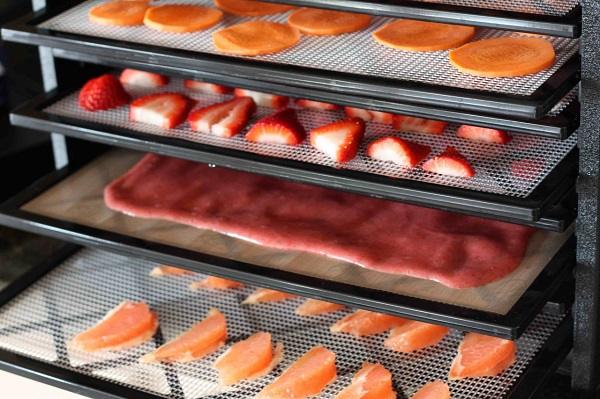
Today, most food is dried in dehydrators. These are low-temperature devices with an electric heat element in them. They don’t produce enough heat to actually cook the food put in it, but merely to make it lose its moisture quicker. While effective, there are some problems with cheaper dehydrators not dehydrating the food evenly. The food that is closer to the heat element dries faster than the food that is farther away. Higher cost dehydrators resolve this problem by circulating the air, so that the temperature inside the dehydrator is more consistent.
Building a Solar Dehydrator
While food can still be dried in the sun, you can increase the efficiency of your operation by building a solar food dehydrator. Since the sun provides a lot of power for free, it only makes sense tapping into that power and using it for dehydrating food. This provides you with a piece of equipment that you can use, even if the power grid goes down.
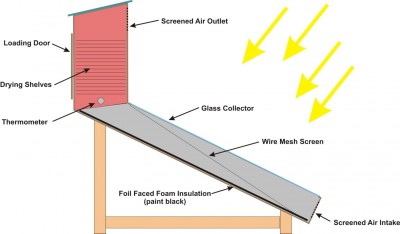
A solar food dehydrator consists of two basic parts: a solar collector and a drying cabinet. The solar collector catches the light from the sun and converts it to heat, and then heats air passing through the collector. That heated air then passes by natural convection to the drying cabinet portion, where it passes through various racks which contain food to be dried. The warmed air, which has transferred much of its heat to the food and received moisture from the food, then passes out of vents in the top of the cabinet.
This design is rather ingenious and uses the basic law of physics that says that warm air rises to function. That eliminates any need for any fans to move the air or any electricity to provide heat.
The sunlight enters the collector, heating the air which is coming in through the air intake at the lowest point in the dehydrator. Temperature can be controlled by sliding doors on the air intake, controlling the amount of air that flows through the solar collector. The temperature can be checked by means of a thermometer located in the side of the drying cabinet.
Paint the inside of the solar collector black to aid in absorption of the sunlight. Adding a wire mesh screen or a few layers of wire mesh screen increases the collector’s ability to convert sunlight to heat. You don’t want enough layers to totally block off the sunlight striking the bottom of the collector, as that would probably also impede airflow.
The angle of the collector is important as well. For the best possible results, the collector should be mounted at an angle equal to:
- If the latitude is below 25o, then the latitude should be multiplied by 0.87
- If the latitude is above 25o, then the latitude should be multiplied by 0.76, plus 3.1 degrees
The drying shelves can be made of screen material, stretched over wood frames, much like window screens. This will allow for good airflow, while providing space for drying a large amount of food at one time. Wood strips to act as drawer runners need to be placed in the drying cabinet portion of the solar dehydrator, for the drying racks to sit on.
The entire solar dehydrator can be made of thin plywood, with a few strips of more substantial material at the corners to help hold it together. Ideally, the entire unit should be lightweight and even mounted on wheels to make it easy to move. You will want to be able to move it to ensure that it is catching the sunlight as the sun moves through the sky. Trees and buildings cause shade, which would of course impede the operation of the device.
A great way to save money on the collector is to find a used aluminum framed window and use that. Many contractors sell these, when they replace the windows on a house. You want a fairly large one, so that you can build a large collector area. Two smaller ones would work as well.
Using the Solar Dehydrator
Like any dehydrator, using your solar dehydrator does require checking on the condition of your food from time to time and removing it in a timely fashion. One advantage of this design is that it will dry the food fairly evenly — much better than an electric dehydrator.
Never leave food in your solar dehydrator overnight. If it is not fully dry, remove the racks and bring them indoors. Dew forming in the night could rehydrate food, prolonging the process and encouraging the growth of mold. Once the dew evaporates in the morning, the drying racks can be reintroduced to the dehydrator to finish the process.
Keep the glass collector clean, as that will improve the efficiency of the dehydrator. Sitting at an angle will cause it to get dirty much faster than a home’s windows will. Fortunately, it’s much easier to clean than a home’s windows.
Sign up for Off The Grid News’ weekly email and stay informed about the issues important to you


