 Most of us are trying to live within our budgets while also trying to take better care of God’s earth. One way that we can do well by our planet and our wallets is to water more plants with less water. We can do this by installing a drip irrigation system in our gardens. Drip irrigation is up to 15 percent more efficient than sprinkler systems. They can also reduce diseases associated with high levels of moisture on some of your plants. Another benefit from having a drip system is that it can save us time in our watering chores, that’s a win-win that we all can use!
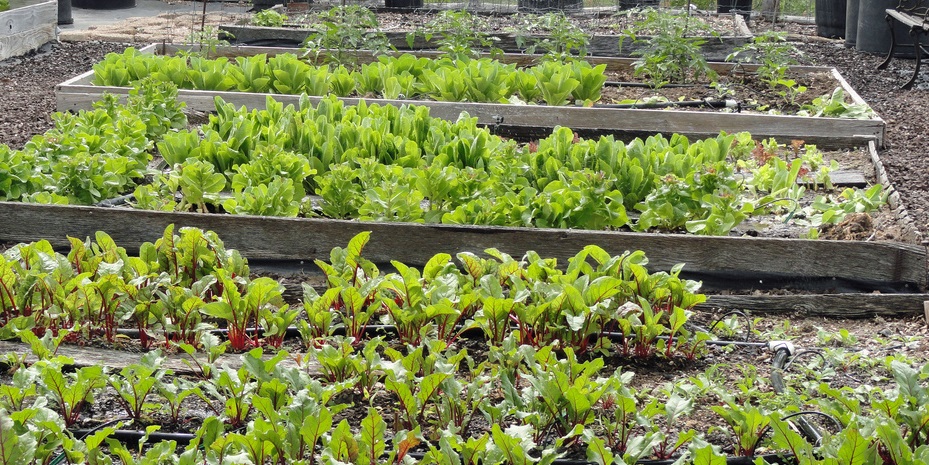
Drip systems, also called trickle irrigation, work by slowly putting water into the soil. This slow, ground-level watering allows for less evaporation of the water, thus making sure that more of it gets to the roots of your plants, right where it is needed.
All of this was what I had in mind for my garden this year, so I hired my brother to lay out and install my new system. But, due to unforeseen circumstances, he was unable to complete the project. Now I am learning how to complete this project while I am writing this article to help all of you. Together we will learn how.
Do The Homework
Installing a drip system doesn’t have to be an intricate network to meet the needs of most gardeners or home landscapers. You can begin with your existing hose bib and branch out in all directions to bring that precious liquid to your garden plots.
Begin by drawing a map of your garden beds. Show what plants are in (or will be in) each bed and how you want the water supply line to lay in the beds. Measure how much of this supply line you will need to feed your garden.
There are many types of fittings and emitters; each will best serve specific type of plant, bed and container, There are also sprayers for ground covers, foggers for hanging containers, and single emitters for reaching plants that are off the beaten path.
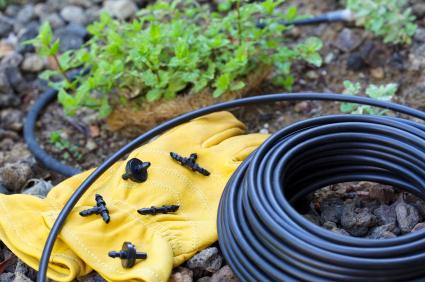
Tubing comes in ¼ inch, ½ inch, and ¾ inch. It comes in pre-punched and un-perforated varieties. The pre-punched tubing comes with factory-installed emitters just under its surface that are spaced inches apart. With the un-punched variety, you can customize the layout of your emitters. You will need to decide which choice will work best for you.
You will also need other supplies. A pressure regulator and vacuum breaker will prevent contaminated water from backwashing into your house. Also needed is a punch to make the holes for the emitters and a tubing cutter to make it the needed lengths. Most gardeners will use ½ and ¼ inch tubing for their layouts. The ½ inch will carry your water supply to the various beds while the ¼ inch will wrap around trees and shrubs to place the emitters at their roots.
New Natural Fertilizer Doubles Garden Production!
Basic Parts
Valves: for turning water flow on and off.
- Isolation valves – manually operated, used when the flow will rarely turned off and on.
- Control valves – used for adjusting individual areas of the garden or yard. They can be automatic (powered by an electric solenoid) or manually operated. There can be one or more control valves, depending on the size of your system. One could control your garden, while other would water the landscaping around your home, and a third could water the hanging plants on your patio.
Backflow Preventer: This will prevent dirt, germs, and other contaminants from being sucked back into your home and drinking water. All drip systems require a backflow preventer. See the list of links below for a checklist to help in deciding what kind of backflow preventer you need.
Pressure Regulators: This valve reduces and maintains lower water pressure than what is used in your home. Drip irrigation works best when the water pressure is lower than 40 pounds per square inch (40 psi). The pressure regulator will only reduce the water pressure; it can’t increase it. There are two common types pf pressure regulators— adjustable and non-adjustable. For the home/backyard gardener, the non-adjustable type is inexpensive and used most often.
Filter: Filters clean the water and may save you some dead plants. Emitters have very small openings and will clog easily, so having a filter may save you from unclogging or replacing emitters. No water, city or well, is free from things that will clog your emitters, so put a filter on your system to save you both time and money down the road.
Emitters: These are small, plastic devices that control how the water drips into the soil. The most common styles emit about a gallon per hour (1 gph). There are many different types available, and each has its advantages as well as its disadvantages. Check out the links below for more info on the different styles so you can choose the best one(s) for your layout.
Do The Math
After you have decided what type of tubing and emitters to use, you will need to measure out how much tubing and how many emitters you will need. Measure the footage required for the tubing and add 10 to 15 percent for good measure. In other words, if you measured out 100 feet, you should buy 110 to 115 feet. If you have chosen the un-punched tubing, you will need to calculate how many emitters you need. Minimum spacing is one emitter for each 18 inches of tubing; again, add 10 to 15 percent extra for good measure or for extra coverage in some areas. So for 100 feet of tubing, you will want to buy at least 78 emitters.
Lay It Out
- Start by attaching the backflow regulator to the pressure regulator. Next screw the filter to the pressure regulator and connect the hose swivel to the threaded end of the filter and then the whole assembly to the hose bib.
- Attach a section of un-perforated tubing or a section of hose long enough to reach from the faucet to the garden beds.
- Using barbed connectors, attach the ½ inch tubing to the un-perforated tubing at the edge of your bed.
- Roll out the tubing and snake it around the plants near the roots. Be sure to keep the tubing lines at least twelve inches apart.
- Once the tubing is in place, secure in to the ground with plastic garden stakes, making sure the hooked end fits over the tubing.
- When the tubing must make a sharp turn, cut it and use an elbow or tee to reattach it in the direction it must go.
- Leave the end of the tubing open so that you can flush the system before using it.
- If you have trees and shrubs in the garden, you will want to wrap a loop of ¼ inch tubing around their bases. To start, use the tubing punch to pierce the ½ inch tubing where the loop begins. Insert a small tee connector in the hole. Attach one end of ¼ inch tubing with emitters to one side of the tee and make a ring around the tree’s trunk – it should extend about halfway between the trunk of the tree and the edge of the canopy. Cut the tubing and attach the end to the other side of the tee.
- If the plants are so dense that it is difficult to snake the tubing at the roots, branch out with micro sprayers. Pierce ½ inch tubing with the hole punch, insert a small, straight connector, and then attach a length of un-perforated ¼ inch tubing long enough to reach the location of the micro sprayer. Attach the other end to the micro sprayer. Clip the micro sprayer to a stake and position it in the ground cover. Run tubing to foggers and other specialized drip emitters in the same manner.
- When all of the tubing and emitters are in place, turn the water on for a minute to flush out the lines. Then turn off water. Slide a ½ inch end clamp onto the open end of the tubing. Fold the end over and slide the other loop of the clamp over the folded piece to hold it closed.
- Check to make sure all connections are tight and that no emitters are clogged. Turn the water on to check for leaks.
- Cover tubing with two inches of mulch to reduce evaporation and give the garden a manicured look.
Now that you have put your drip system together and tested the lines, plant some plants and put your new water lines to work. For more information and pictures, check out the links below. Happy gardening!
Resources:
Installation Directions – https://lifehacker.com/5567712/install-your-own-drip-irrigation-system-on-the-cheap
Drip System Parts – https://www.irrigationtutorials.com/drip-parts.htm
Backflow preventers – https://www.irrigationtutorials.com/backflow-preventers.htm
©2012 Off the Grid News


