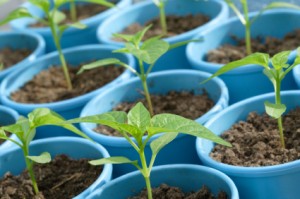
 If you’re like most people who live in a place that has winter, you are probably itching to get outside. Cabin fever tends to set in by January, although for the tougher amongst us, maybe not until February. While you can certainly spend time outdoors in the winter, the cold temperatures, gray skies, and lack of green can leave you feeling glum and even depressed. One way to beat the winter blues is by working on your garden.
If you are living the off-the-grid lifestyle, you undoubtedly keep a vegetable garden. Growing your own vegetables is an important part of surviving without the constraints of modern society. With your very own vegetable patch you can meet the nutritional needs of your family. You may even be able to sell some of your extra food at a local market or trade with your neighbors for other goods that you need. An excellent way to get your garden started while the sun is still setting early is to begin seeds indoors. Many of your vegetables can be started inside, giving you some growth earlier in the year. Those that are started outside will have to wait, but this gives you a staggered harvest, which is very useful.
Vegetables That Can Be Started Indoors
Exactly what vegetables you can start indoors and when you should start them will depend upon where you live. But, generally, there are several vegetables can be start inside from seeds with minimal effort and great results. The following do well when started in February or March:
- Spinach
- Chard
- Lettuce, all different varieties
- Cabbage
- Broccoli
- Cauliflower
- Brussels sprouts
- Tomatoes
- Herbs
A little bit later, around the end of March, you can start some of your warmer weather crops like:
- Pumpkins
- Squash
- Zucchini
- Melons
- Cucumber
To know for sure what you can start and when to start them, find out what growing zone you live in and check the directions on the seed packet. It should tell you when each vegetable can be started for your particular location.
Materials You Will Need
The good news is that starting seeds indoors is not really any different from starting seeds outdoors. Like all plants, your seeds will need soil, light, and water. To be a little bit more specific, you will need a sunny spot that is not too cold. A south-facing window is ideal for optimal sunlight. You need a good potting soil that is light and fluffy. Seeds do not appreciate heavy soil. You can purchase commercial medium soil, or you can create your own mix. A good recipe for seeding soil includes one part sand, one part loam, and one part peat. You may include fertilizer, but it is not necessary. It is best not to use soil from your garden as that can introduce pests, weeds, or disease to your new seedlings. Also, your garden soil is typically too heavy for seed starting.
Next, you will need to find some containers. You can start with one large container and thin out your seedlings after they have sprouted, or you can start with individual containers that will be large enough to hold your sprouts until they can go outside. Just be sure that your containers have adequate drainage so you don’t drown your seeds. If you saved containers from plants that you purchased previously, they can be used to excellent effect. Left over plastic food containers also work as long as you punch out some drainage holes.
You will also want some kind of labeling system so you can record the name and date started for each set of seeds. You can use tags designed for this purpose, but popsicle sticks are an easy choice too. Be sure to use permanent marker so that your labeling does not wash off during watering.
Plant Your Seeds
Begin the process by getting your potting soil mix ready. It needs to be damp, but not soaking wet. Put your soil into a large container, like a bucket, and wet it until it is just moist all the way through. Stir it with your hands to distribute the water evenly. If you overdo it and get the soil too wet, give it some time to dry out a little before planting.
Fill your seedling containers with your moistened soil and level each so that the top surface is flat. Gently press your seeds into the surface of the soil. You don’t want the seeds to go too deep, but they need to be in good contact with the soil. For very small pots, like planting trays, put one or two seeds in each container. For larger pots, space the seeds every inch or two. If you over seed, you will just have to thin out the plants later.
Once the seeds are in the pots, sprinkle a little bit more soil over the top. To be sure about how deep your seeds should be, check with your seed packet. The general rule is that the depth should be about four times the diameter of the seed. This means that the smaller the seed, the more shallowly placed it should be in the soil.
The seeds will take anywhere from eight to twelve days to sprout. To ensure the best results, you want your containers to be evenly warm and moist. To keep them warm, place them in a warm spot in the house. Do not keep them on a windowsill where the temperature can vary. To keep the soil moist, cover the pots with plastic wrap. You can also mist them with water every few days as necessary.
You Have Seedlings!
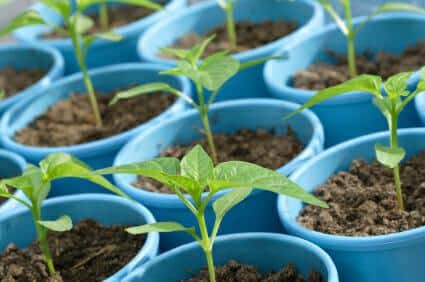
Once your seeds have sprouted, they will need light. It’s time to move them to your sunniest window. If you don’t have a good spot for them to get adequate sunlight, you may need to invest in lamps. If it is very cold by the window, keep the pots a little ways back so they don’t get too cold. If your house is very drafty, you might consider using a heating mat. Find one made just for this purpose so you don’t burn your plants.
Your sprouts will also need more water at this point. Be sure that the pots drain well and keep the soil moist. Do not over water them or let them dry out. You need to find the right balance. There are two great ways to get your sprouts the right amount of water. You can set the trays or pots in a dish of water. The soil and roots will soak up the appropriate amount of moisture. You can also continue to mist the pots from the top as you did with the seeds.
When the danger of a frost is gone, you can put your little seedlings out in the garden. Make sure they are several inches tall and cover them if there is a chance that they will be vulnerable to plant predators like rabbits. They find the young shoots to be particularly tasty.
Save Your Seeds for Next Year
You’ll never need to purchase new seeds if you save some from your garden. However, you do have to let some of your plants go to seed if you want to collect them. That means not getting a harvest from those plants. If you plan to collect seeds, put a few extra plants in the garden just for that purpose. Some plants will give you seeds from the fruit, so you don’t have to worry about this: melons, squash, and peppers are examples. The method for collecting seeds varies by plant type, so research your vegetables and herbs to find out the best way to get them.
Happy indoor (and outdoor) gardening!


