You never know when a family member might get injured. Accidents, by their very nature, are unpredictable. While we might be able to say that some activities are statistically more likely to produce accidents, that doesn’t help us predict when they will come or who will receive them.
This can be even worse in a survival situation, where family members will be called on to do activities and use tools which they aren’t accustomed to. What makes that even worse is that medical services tend to become overrun during such times, making it harder to get your loved ones the help that they need. If you happen to be in an outlying area, where you have to go a distance to get to help, that makes the situation worse.
In such a situation, your ability to provide adequate first-aid could make the difference between life or death. Few of us have training in first-aid techniques more complicated than applying a self-adhesive band-aid. Fortunately, a few supplies and a little knowledge can make all the difference in the world.
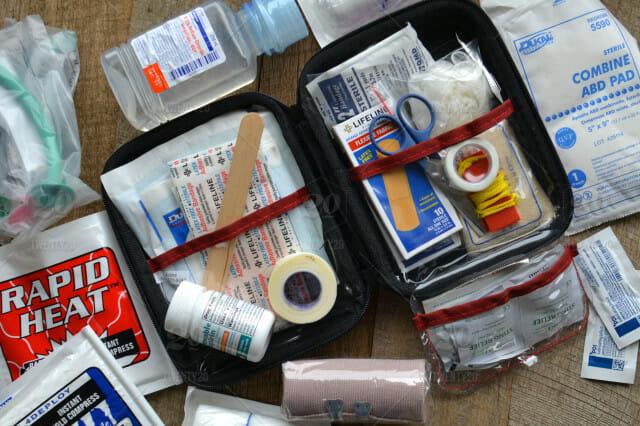
At this point, I’m going to make an assumption, as dangerous as that is. I assume that you already have a good first-aid kit. I’m not talking about a $19.95 drugstore special here, but an actual trauma kit, which allows you to treat more extensive wounds. Even then, you might be missing some crucial things.
Tourniquet
Tourniquets are used to stop excessive bleeding from the extremities. How do you know when one is needed? Whenever you see spurting blood coming out of a wound on one of the patient’s limbs. In that case, there is a risk of them bleeding out before they get to medical care.
There are many types of tourniquets on the market, made in some different ways. But there are three important things you want to keep in mind when choosing one:
- You want something that can be used one-handed, in case you have to use it on yourself.
- The idea of the tourniquet is to crush the veins against the bone, blocking blood flow. To do that, the ones with a windlass for tightening the tourniquet work best.
- Buy quality. The last thing you need is a tourniquet breaking when you’re trying to use it.
Many people say that the tourniquet should be applied two inches above the wound. The problem with this is that not all wounds are nice neat round holes. Wounded veins often tear longitudinally, so if you only put the tourniquet two inches above the injury, the wound might still bleed internally. Go higher; as high as you reasonably can.
Clotting Agent
Clotting agents work by cauterizing the wound, stopping blood flow. They are ideal in situations where a tourniquet might not be usable, such as a shoulder wound. But for it to work, it needs to be pressed into the wound and held in place while it heats and cauterizes the wound. It will be excruciating as you can imagine, so you may need some help in holding the patient down.
Steri-Strips
Open wounds, where the skin does not meet are dangerous from an infection point of view. They are also less likely to heal properly. In that case, you want something to hold the skin together. Typically, doctors use stitches for this, but you and I are not trained in suturing. Steri-strips allow you to keep that wound closed so that it can heal.
Irrigation Syringe
All wounds should be cleaned before they are bandaged. A large syringe, with a plastic (non-penetrating) needle, makes this much easier to accomplish. Any water which is clean enough to drink is sufficient for use in the syringe.
Lidocaine
This is a topical anesthetic, available in a cream, which numbs the skin. Most often used before giving an injection, it is also ideal for use around a wound, when needing to clean it.
Benzoine
Any adhesive bandage and most medical tapes need a clean surface to stick to. This can be difficult to accomplish in the field. Benzoine is a liquid product for cleansing the skin around a wound, allowing those bandages to stick.
Chest Seal
Used for sealing a chest wound, specifically for a patient which has been shot in the chest, causing what is known as a “sucking chest wound.” Without a chest seal in place, it is possible for the person to draw air in through the wound, on every breath. This will take up the space the lungs need to have to inflate, making it impossible for the person to catch a good breath.
While it is possible to make a chest seal out of any thin plastic material, such as a plastic bag and some tape, it is best to use a premade medical chest seal because it is sterile and already has the adhesive applied.
Needle Chest Decompression
The state where there is air in the lung cavity which prevents the lungs from inflating properly is called a “tension pneumothorax.” The sign that a patient is suffering this is that the veins in their neck are distended, and they can’t inhale. In such a case, the air needs to be allowed a means of escape, so that they can breathe again.
A special needle is used for this, which can be bought in a needle chest decompression kit. This kit also includes chest seals. To use the needle, find the top of the sternum and move down 1½ inches. That’s where the second rib is. There will be a bump on the sternum there. The needle needs to be inserted between the second and third rib, above the nipple.
The needle needs to be pushed in as far as it will go. There is a plastic part of the needle, which will stop it from going any further. Once inserted, remove the metal needle, leaving only the thin plastic sleeve in place. This is flexible, so will move out of the way as the lung inflates. Do not worry about hitting the lung, as if you do, it will heal.
Saran Wrap
Believe it or not, everyday plastic wrap for food is a useful first-aid supply to have on hand. Specifically, it is helpful for multiple wounds, such as those caused by a shotgun or shrapnel from a grenade. In such a case, it will be virtually impossible to bandage all the wounds properly. Wrapping the patient in Saran Wrap will at least protect the wounds from dirt and bacteria, while you are transporting them for medical care.
Nasal Pharyngeal Airway
In cases where the patient is unable to control their breathing, it is not uncommon for the tongue to fall across the airway, blocking it. Obviously, something needs to be done in these cases, to retain the airway open. There are several types of airways on the market, designed for this purpose.
The advantage of the nasal airway is that it is less uncomfortable for the patient. Inserted in the nose, they are unable to bite down on it, blocking off the airflow. Made of soft rubber, these come in different sizes. You’ll want to pick one that is the size of the patient’s pinkie. Cut it to length, from the tip of the patient’s nose to the angle of their jaw. Then push straight into the nose, not angling it up.
This type of airway should not be used in cases where there is bruising behind the ear, or the patient has blood coming out of their ear.


