From the time people roamed the earth as hunter-gatherers, their very survival might have depended on preserving meat — their main source of protein — to tide them over in times of scarcity.
Burying portions of the kill deep in the snow in winter, and drying it crisp over the rocks in the blazing heat of summer, he would have managed to stay alive from season to season. His meat preservation methods may have been crude, but they are successfully employed even today, the only difference being the technological advances that have delinked the processes from the vagaries of nature.
Even with round-the-year availability of fresh and processed meat, it is not a bad idea to keep a good storage of meat as a hedge against possible emergencies in the future. Moreover, in this era of highly processed food, by storing your own meat you get to control what goes on your plate.
Dehydrating
A chemical-free way to preserve meat is to dehydrate it until it becomes too dry for microbial action. Compared to traditional sun-drying, using an electric dehydrator is faster and safer. Whether you like the chewy texture of beef jerky cut along the grain or the more crumbly cross-cut chips, the slices need to be thin to ensure thorough drying inside and out.
Fat in the meat may go rancid when kept, so be sure to remove all skin and fat before slicing the meat into strips not more than one-fourth of an inch in thickness. Lean cuts and chicken breasts are preferable to fattier portions.
Make sure your dehydrator has a temperature setting of 165 degrees Fahrenheit required for heating the meat strips to destroy harmful bacteria like E.coli and Salmonella. It is much safer if you thoroughly heat the prepared meat in an oven set over 250 degrees F for 10-15 minutes before transferring it to the dehydrator. Continuous running of the dehydrator at its maximum temperature for 16-20 hours will make the jerky sufficiently dry. Store the dried jerky lightly packed in airtight containers. It will stay good at room temperature for up to two months. Extend its shelf life by storing in the freezer or by vacuum sealing it.
Curing with salt
Common salt is the dehydrating agent that helps preserve the meat here. Meat cured with salt is safe, as salt acts as an anti-microbial. There are basically two ways to salt-cure meat. Rubbing salt on the meat and letting the juices drain off will result in a dry product. The process is as easy as mixing salt with the meat, but for better flavor, spices and herbs are often used. Meat can be preserved in salt solution, too; it is called “brining.” You can add brown sugar or honey for extra taste. Another traditional curing process called “biltong” involves marinating the meat in vinegar prior to salting and drying.
Commercially available salt-cured meat products contain several additives to improve their texture. You can cut down the chemical load by curing the meat with “kosher salt,” which is free of additives. Specially formulated “curing salt” contains about 6 percent sodium nitrite, a chemical that’s known to offer some protection against botulism, but bad for you over the permitted limits. USDA’s recommendation is one ounce of curing salt per quart of water.
Canning meat
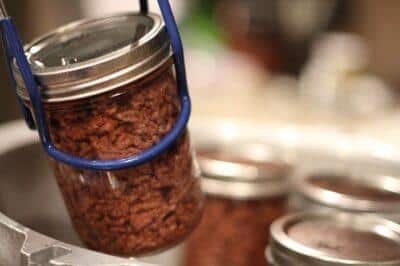
For long-term preservation, meat is best canned. Since it can be stored at room temperature for years, there is nothing like canned meat to enhance your crisis preparedness. Canning essentially means sterilizing the food within a container and sealing it against external contamination. Jars with lids and sealing rings are a prerequisite – and so is a pressure canner that ensures thorough heating of the contents of the jar.
Prepare Now For Surging Food Costs And Empty Grocery Store Shelves …
Traditionally, the cans were sterilized in a water bath, but it is no longer considered safe, especially for meat. There are two ways to go about it: hot packing or raw packing.
Hot packing
Meat is pre-cooked in this method. Salt and spices are added while boiling meat. Transfer the pieces into the hot jars when they are two-thirds done. Pour the hot broth over the pieces, leaving just over an inch of headspace. Check for large bubbles and release them with a skewer. Wipe the jars clean and cap them tightly before processing in the pressure canner.
Raw packing
Raw meat chunks are packed into the jars after adding salt. There is no broth or liquid to pour in, but the meat will release some as it is processed in the pressure cooker. Raw packing requires longer processing time.
The pressure and time required vary with the altitude and the quantity of meat processed at a time too. Follow the USDA guidelines for safe canning. Check the lids to ensure vacuum sealing. You need not refrigerate canned meat, but storing it in a cool place increases shelf life. It will keep for years as long as the seal is intact.
Safety first
Whatever method you use, the success of meat preservation hinges on the quality of the meat used. Always go for the freshest cuts. Process the meat immediately, keeping it chilled in the meanwhile. Closely follow the recipes and the USDA guidelines for food safety.
Enjoy the fruits of your labor!
Have you ever canned meat? What tips would you add? Share them in the section below:
 Off The Grid News Better Ideas For Off The Grid Living


